Membrane API Gateway can validate JWTs issued by Microsoft's Azure AD. Based on the result of the validation a request is passed to a backend service or rejected. This tutorial shows step by step how to setup Azure AD and Membrane for JWT validation.
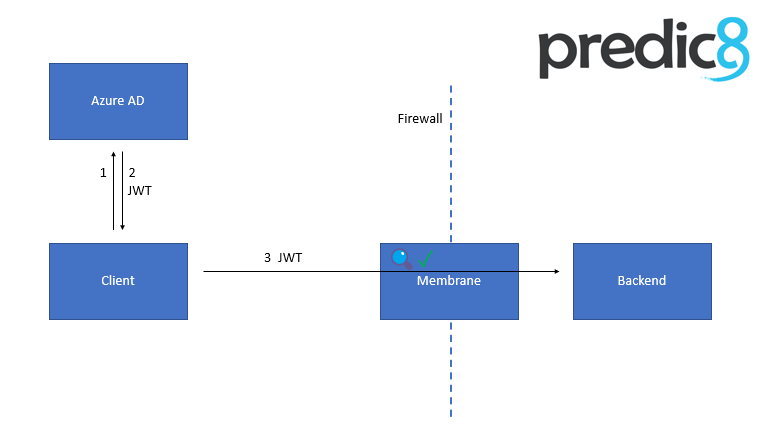
An API protection flow is shown in the picture below. Membrane is placed before the backend and allows only requests with valid tokens to go through.
The flow of requests is as follows:
Membrane API Gateway exposes the backend e.g. to the hostile internet. Only requests with a valid JWT are allowed to pass.
Both the client and the backend are registered in Azure AD with an App registration. Don't get confused. ;)
Take note of your Tenant ID. (Format should be 44xxxxx6-xxxx-xxxx-xxxx-bxxxxxxxxx51)
Open: https://aad.portal.azure.com/#view/MicrosoftAAD
IAM/ActiveDirectoryMenuBlade/~/RegisteredApps.
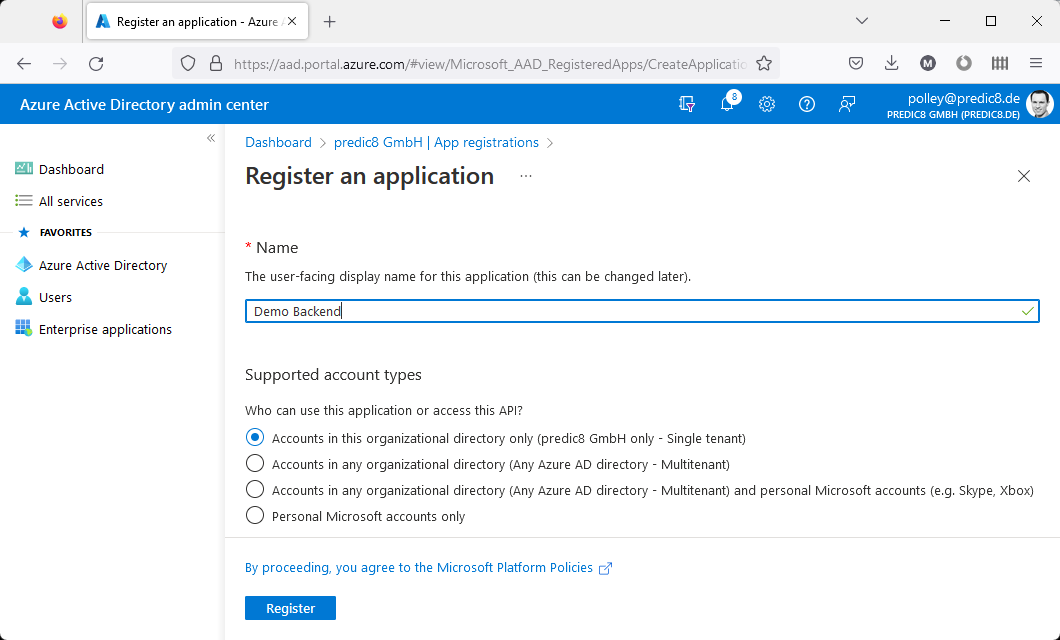
New registration.Enter a name (e.g. Demo Backend) and click Register.
Next to Application ID URI, click on Add an Application ID URI.
Set.Save.api://2axxxx16-xxxx-xxxx-xxxx-faxxxxxxxxf0.)ReadWrite into the Display name, Value and Description fields.Both (Users/Groups + Applications) as Allowed member type*.Apply.There are several possibilities of getting a valid token. For this demo, we use the OAuth 2.0 client credentials flow. (This is an example of the Access without a user scenario described on https://learn.microsoft.com/en-us/azure/active-directory/develop/permissions-consent-overview.)
New registration.Enter a name (e.g. Demo Client) and click Register.

Take note of your Application (client) ID.
Add a certificate or secret.Click on New client secret.
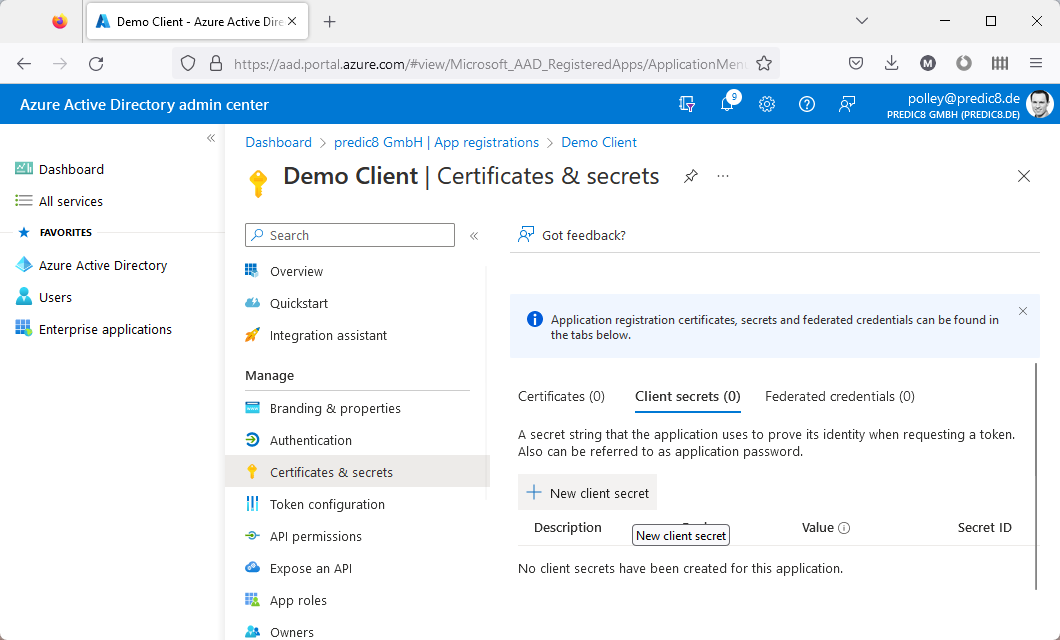
Demo Secret as Description.Add.Value, also known as the client secret.API permissions.Click on Add a permission.
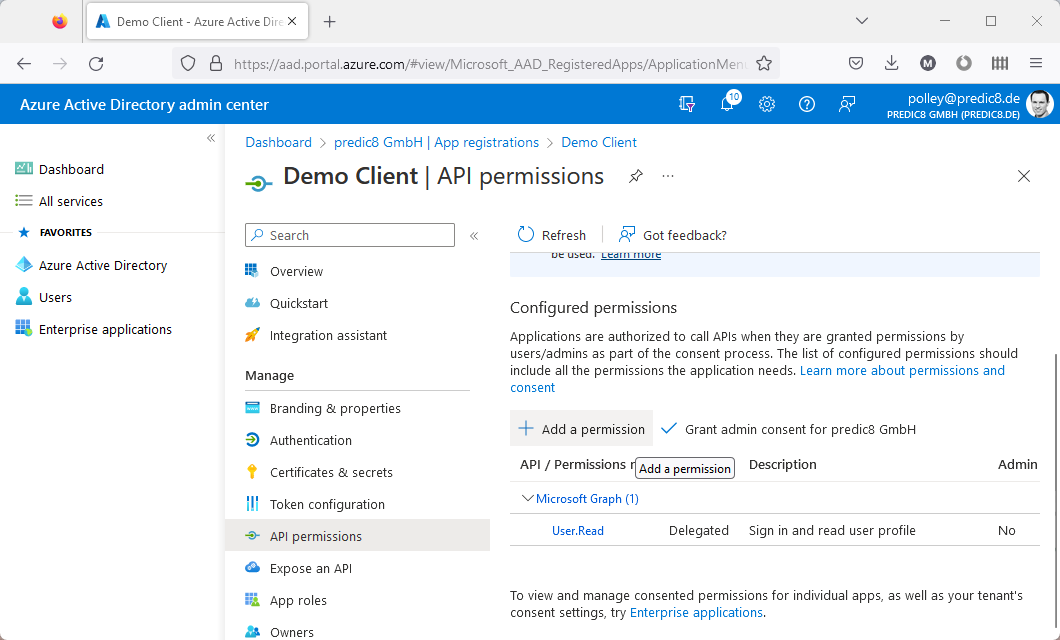
Request API permissions window, click on the tab My APIs and choose Demo Backend.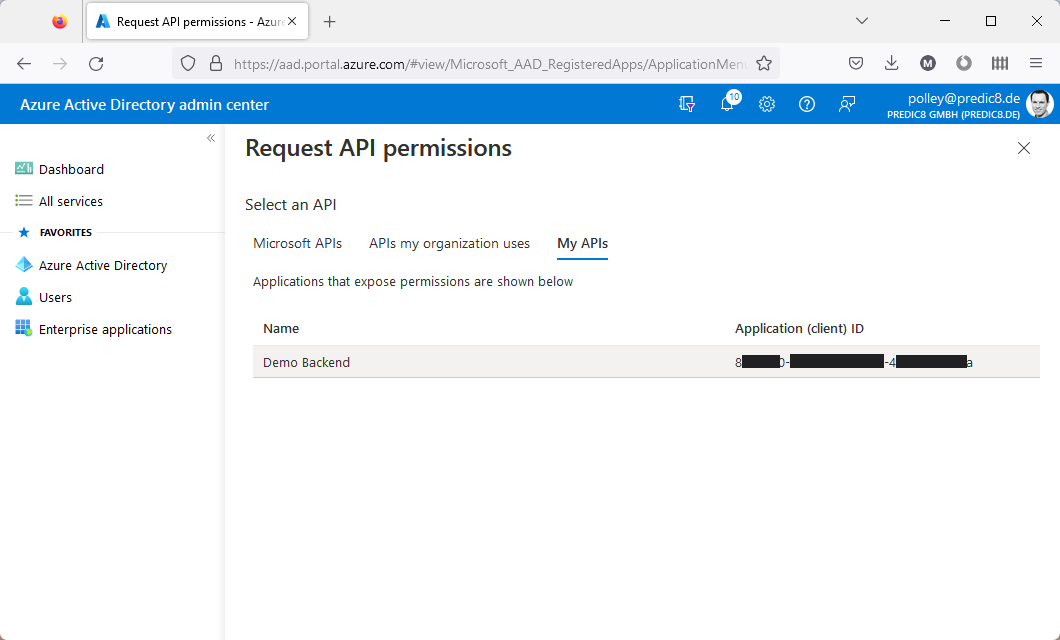
Select the ReadWrite permission.

Add permission.Replace the values in the curl command below according to the table.
| replace | by |
|---|---|
7fxxxxx1-xxxx-xxxx-xxxx- | the Application(client) ID (see section 2.a.) |
Dlxxx~xxxxxxxxxxxxxxxxxx | the client secret (see section 2.a.) |
2axxxx16-xxxx-xxxx-xxxx-faxxxxxxxxf0 | your backend's Application ID URI (see section 1.) |
44xxxxx6-xxxx-xxxx-xxxx-bxxxxxxxxx51 | the tenant ID (see section 1.) |
curl -o token.json -d "grant_type=client_credentials&client_id=7fxxxxx1-xxxx-xxxx-xxxx-6xxxxxxxxx1b&client_secret=Dlxxx~xxxxxxxxxxxxxxxxxxxxxxxxxxxxxxxc1f&scope=api://2axxxx16-xxxx-xxxx-xxxx-faxxxxxxxxf0/.default" "https://login.microsoftonline.com/44xxxxx6-xxxx-xxxx-xxxx-bxxxxxxxxx51/oauth2/v2.0/token" -vand execute it. curl saves the token in the file token.json.
Look at token.json and extract the token from the field access_token. (Format should be similar to ey...J9.ey...fQ.....)
Now the token can be used to authenticate against an API running on Membrane.
proxies.xml file in the examples/oauth2/azure-ad-with-jwts directory of your Membrane distribution.Take a look at the following section:
<jwtAuth expectedAud="api://2axxxx16-xxxx-xxxx-xxxx-faxxxxxxxxf0">
    <jwks jwksUris="https://login.microsoftonline.com/common/discovery/keys"/>
</jwtAuth>
This allows only HTTP requests which include valid JWT tokens to pass.
Replace 2axxxx16-xxxx-xxxx-xxxx-faxxxxxxxxf0 by your backend's Application ID URI (see section 1.)
service-proxy.bat or service-proxy.sh in the console.In the ''curl'' command below,
| replace | by |
|---|---|
ey...J9.ey...fQ.... | the token |
curl -H "Authorization: Bearer ey...J9.ey...fQ.DL...hQ" http://localhost:8080/and execute it.
You should be greeted by a message like
Hello there, d5xxxxx2-xxxx-xxxx-xxxx-fxxxxxxxxx7e.This is the OID of the subject (=owner) of the token, which was assigned to the Demo Client. (See also https://learn.microsoft.com/de-de/azure/active-directory/develop/id-tokens.)
The greeting, including the OID, was issued as specified in proxies.xml.