Using Postman to request and authenticate with OAuth2 tokens
This step-by-step tutorial explains how to request OAuth2 tokens using Postman, and how to use the tokens to
authenticate HTTP requests.
Setup
Before we start sending requests, we first need to set up our environment.
Make sure you have downloaded the latest release .zip of the Membrane API Gateway, we use Membrane as our
OAuth2 token server.
To run Membrane you will require a JDK of at least version 21.
Extract the Membrane archive and navigate to the folder examples/oauth2/api.
Start the Windows or *nix shell script service-proxy.(sh|bat) in authorization_server
Also start the script service-proxy.(sh|bat) in token_validator
If Postman is not already installed, download it from the official
Postman downloads page.
After Postman is installed, you can run the application.
You have the choice of logging in, or using Postman in Lite mode.
Step 1: Request without Token
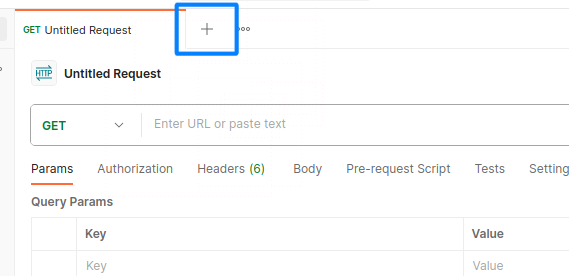
Fist, we need a new request. You can either use the default request that appeared initially or create a new one.
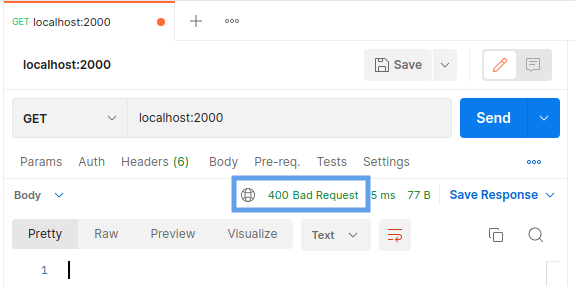
Enter the URL localhost:2000 and click 'Send'.
You'll notice that the server returns a status code 400 Bad Request. This occurs due to the absence of a
valid Token.
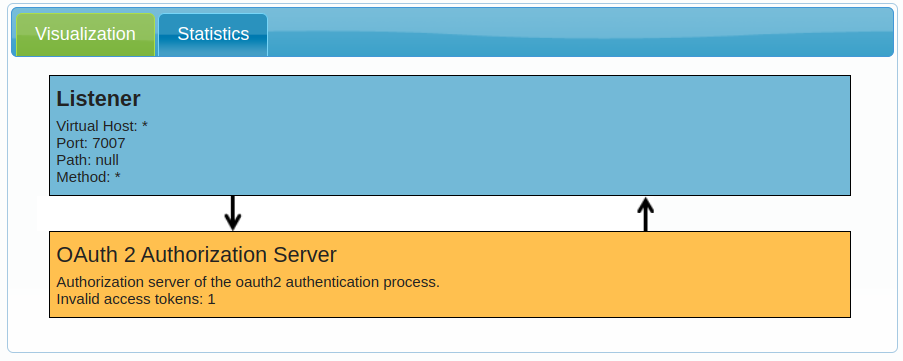
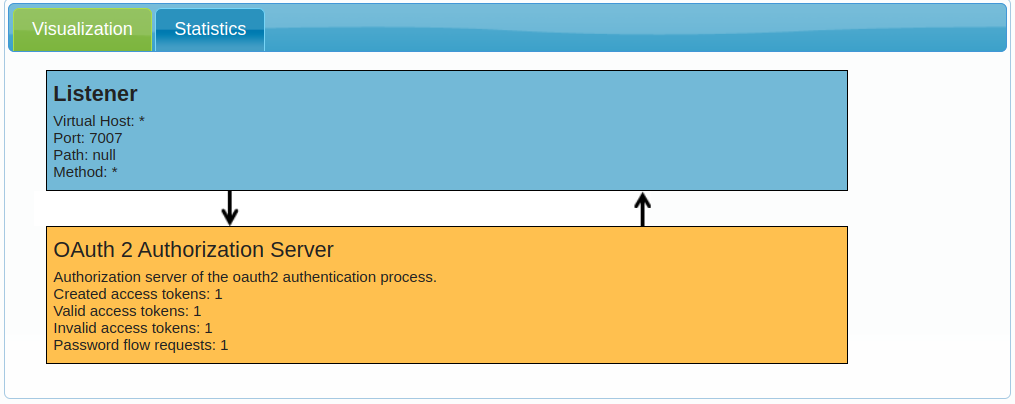
Now go to localhost:9000 and click on Authorization Server
Here, you can see that there was one request made with an invalid access token. If you repeat the request, the count
will increase accordingly.
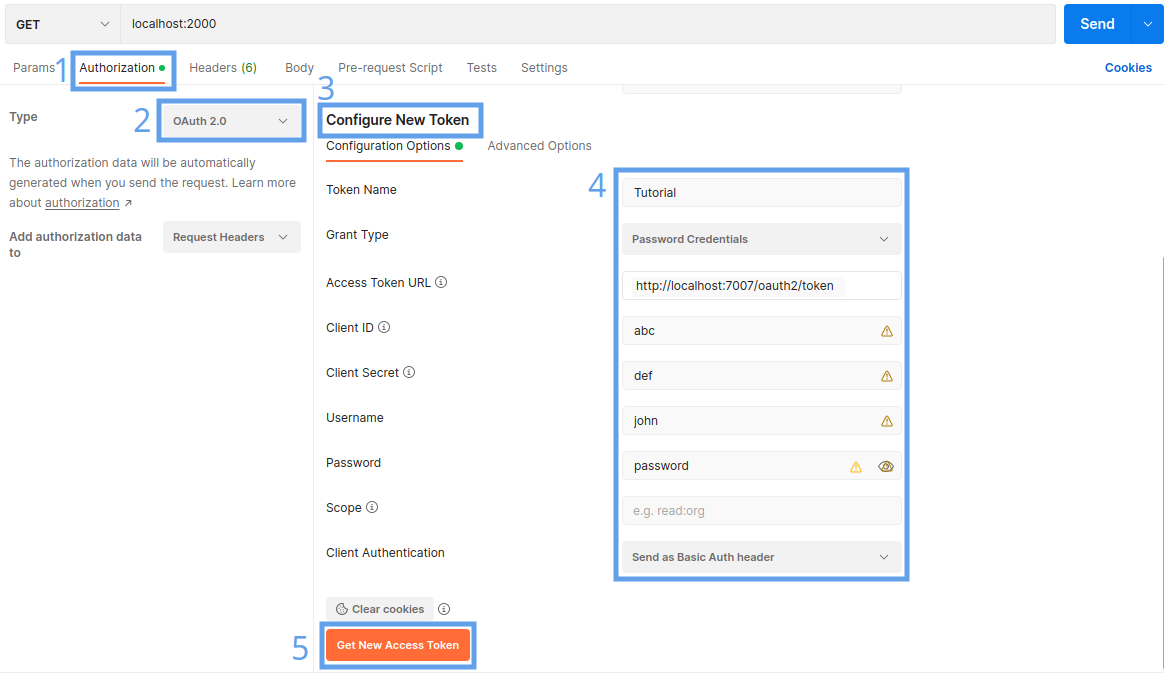
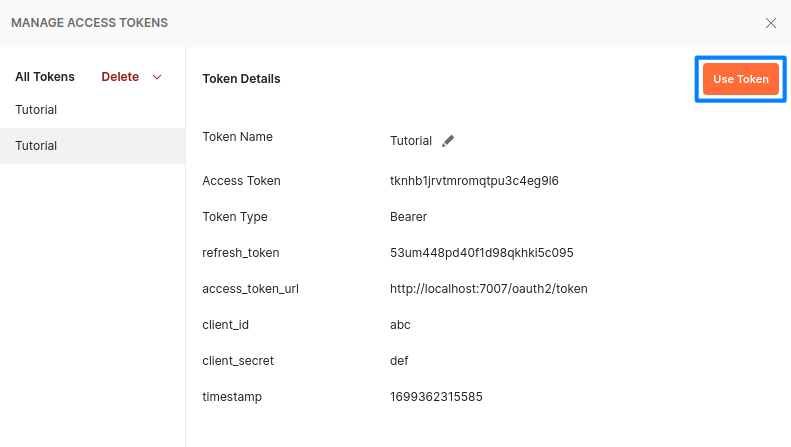
You can now see that one Access Token has been created.
Step 3: Using the OAuth2 Token in a Request
Once you pressed Use Token, the Access Token is set and will be used for the following requests.
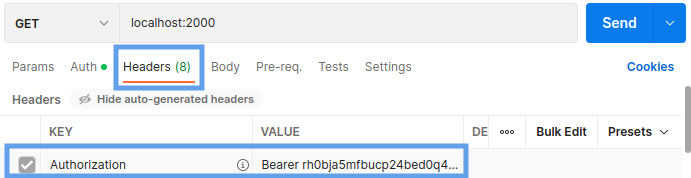
Now Click on Headers.
The Authorization Header is set to the requested Token. Now repeat the request to localhost:2000 using this Header. The request will return a status code 200 Ok along with the following body:
{
"success": true
}
When you return to the Admin Console again, you'll notice there is now one request with a valid access token.